Welcome to the world of e-bike technology! An LCD display is a crucial component that enhances your riding experience by providing real-time data and customizable settings․ It offers essential features like speed tracking‚ battery monitoring‚ and mode selection‚ ensuring optimal performance and safety․ This guide will help you understand and utilize your e-bike’s LCD display effectively․
1․1 Purpose and Importance of the LCD Display
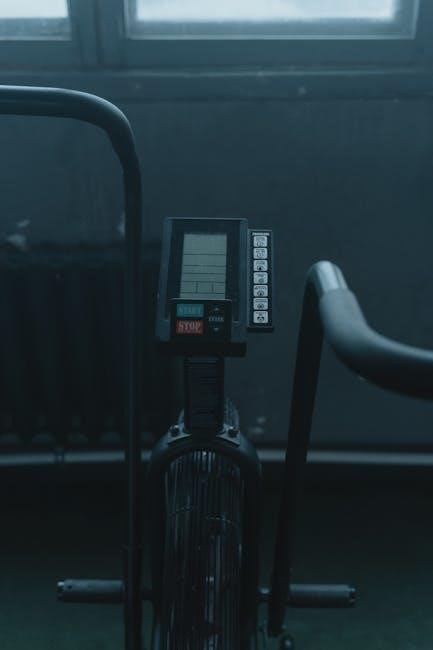
The LCD display on an e-bike serves as a central interface‚ providing real-time data such as speed‚ battery level‚ and riding mode․ It allows riders to monitor performance‚ adjust settings‚ and ensure safety․ The display is essential for optimizing energy use‚ tracking progress‚ and accessing advanced features like cruise control․ Its waterproof design and energy-efficient technology ensure durability and reliability in various conditions․ By offering clear visuals and intuitive controls‚ the LCD display enhances the overall e-bike experience‚ making it a vital component for both convenience and performance․
1․2 Overview of Key Features and Functions
E-bike LCD displays offer a variety of features to enhance riding․ They include speed indicators‚ battery level monitoring‚ and multiple riding modes such as Eco‚ Standard‚ and Power․ Additionally‚ functions like cruise control‚ walk assist‚ and error code displays are common․ The LCD also shows voltage readings and allows for customization of settings to optimize performance․ Many displays are waterproof‚ ensuring durability‚ and some models support firmware updates for improved functionality․ These features collectively provide riders with control‚ convenience‚ and essential insights into their e-bike’s operation․
Installation and Setup of the LCD Display
Installing an e-bike LCD display involves mounting it securely‚ connecting cables to the controller‚ and configuring settings․ Follow the manual for precise hardware and software setup instructions․
2․1 Hardware Installation Steps
To install the LCD display‚ begin by mounting it securely on the handlebar using the provided bracket․ Ensure the display is level and firmly attached․ Next‚ connect the LCD to the e-bike’s controller using the appropriate waterproof connector․ Carefully route the cables‚ avoiding any moving parts or pinch points․ Secure loose wires with zip ties for a clean setup․ Finally‚ power on the system to verify the display lights up and functions correctly․ Always refer to the manual for specific connector pinouts and torque specifications to prevent damage․
- Mount the display on the handlebar using the provided bracket․
- Connect the LCD to the controller with a waterproof connector․
- Route and secure cables to avoid interference or damage․
2․2 Software Configuration and Pairing with the E-Bike Controller
After hardware installation‚ turn on the LCD display and access the settings menu․ Select the appropriate controller type (e․g․‚ KT or SW900) to ensure compatibility․ Adjust parameters like pedal assist sensitivity and speed limits according to your preferences․ Pairing involves syncing the display with the controller‚ which is typically done by holding the set button for 5 seconds․ Once paired‚ test all functions‚ such as PAS modes and cruise control‚ to ensure proper operation․ Refer to the manual for specific codes and calibration steps to optimize performance․
- Turn on the display and navigate to the settings menu․
- Select the correct controller type for pairing․
- Adjust settings like PAS levels and speed limits․
- Sync the display with the controller using the set button․
- Test all functions to confirm proper operation․

Understanding the LCD Display Functions
The LCD display is essential for monitoring and controlling your e-bike‚ offering functions like speed tracking‚ battery level‚ voltage display‚ and riding mode selection for optimal performance․
3․1 Speed Indicator and PAS (Pedal Assist System) Modes
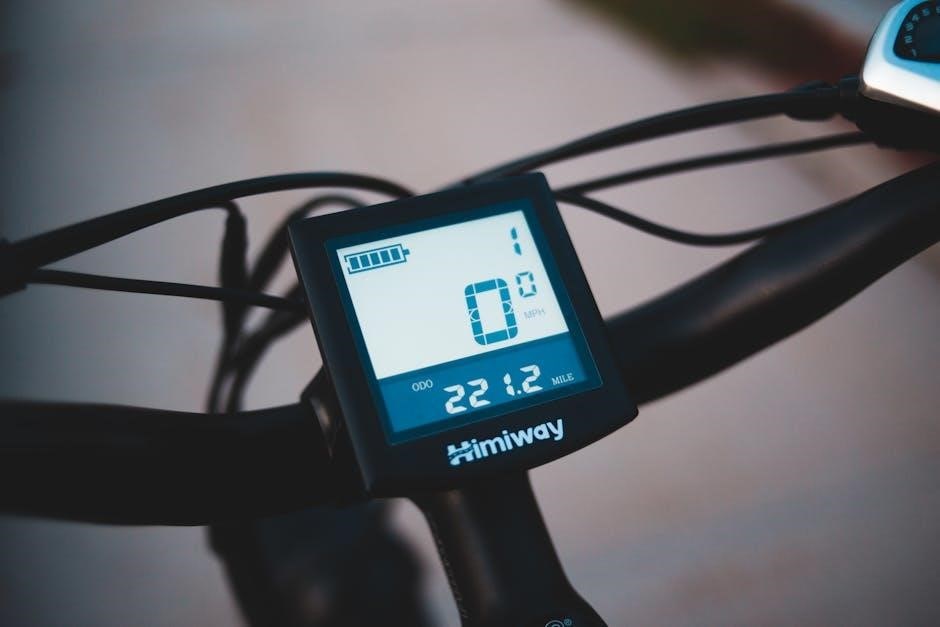
The LCD display features a clear speed indicator‚ showing your current velocity in real-time․ The PAS system offers multiple modes‚ allowing you to adjust pedal assistance levels for varying terrain․ Lower modes conserve battery life‚ while higher modes provide maximum power․ Switching between modes is seamless‚ ensuring a smooth riding experience․ The display also offers cruise control‚ maintaining a constant speed with a single button press․ This functionality enhances comfort and efficiency‚ making your e-bike adaptable to any riding condition․
3․2 Battery Level and Voltage Monitoring
The LCD display provides real-time updates on your e-bike’s battery level‚ ensuring you stay informed about remaining power․ It shows the battery percentage and voltage‚ helping you monitor energy consumption․ A low-battery alert notifies you when the charge drops below a certain threshold‚ preventing unexpected shutdowns․ Some displays also indicate voltage fluctuations‚ aiding in troubleshooting․ The battery symbol on the screen makes it easy to glance at your power status․ This feature ensures you can plan your rides efficiently and maintain optimal battery health for extended longevity and performance․
3․3 Riding Modes (Eco‚ Standard‚ Power)
Your e-bike’s LCD display allows you to switch between three primary riding modes: Eco‚ Standard‚ and Power․ Eco mode optimizes battery life for longer rides‚ offering gentle pedal assistance․ Standard mode balances power and efficiency‚ making it ideal for everyday use․ Power mode unleashes maximum motor assistance for faster acceleration and tackling challenging terrain․ The display clearly indicates the selected mode with distinct icons or highlights‚ ensuring seamless transitions․ This feature enhances your riding experience by letting you customize performance based on your needs and route conditions․ Switching modes is easy via the display’s buttons‚ providing instant control․

Customization and Settings
The e-bike LCD display enables customization of settings such as speed limits‚ pedal assist levels‚ cruise control‚ and walk assist‚ optimizing performance for a tailored riding experience․
4․1 Adjusting Settings for Optimal Performance
Adjusting settings on your e-bike LCD display ensures a personalized riding experience․ Access the menu using the control buttons to modify parameters like speed limits‚ pedal assist levels‚ and power modes․ Fine-tune these settings to match your riding style and terrain conditions․ For example‚ increase pedal assist sensitivity for easier climbing or reduce power output for longer battery life․ The display provides real-time feedback‚ allowing you to optimize performance based on your needs․ Regular adjustments can enhance efficiency‚ comfort‚ and overall control of your e-bike․
4․2 Configuring Cruise Control and Walk Assist
Cruise control and walk assist are convenient features on your e-bike LCD display․ Cruise control allows you to maintain a steady speed without pedaling‚ ideal for long stretches‚ while walk assist provides a slow‚ consistent speed for walking beside your bike‚ enhancing safety․ To configure these‚ navigate to the settings menu on your LCD display and select the appropriate options․ Adjust the cruise control speed to your preference and enable walk assist for safe maneuvering; These features enhance your riding experience by reducing effort and ensuring control․ Refer to your manual for specific button sequences to activate these modes․
Monitoring and Maintenance
Regularly monitor your e-bike’s performance through the LCD display‚ checking battery levels‚ error codes‚ and firmware updates․ Ensure the display is clean and protected from damage to maintain functionality and clarity․ This helps in identifying issues early and keeping your e-bike in optimal condition․ Always refer to the manual for specific maintenance guidelines and troubleshooting steps to ensure your LCD display remains reliable and accurate․
5․1 Reading Error Codes and Troubleshooting
Modern e-bike LCD displays often feature error codes to indicate system issues․ These codes‚ such as “E-01” or “E-02‚” are usually explained in the manual․ If an error appears‚ refer to the troubleshooting section to identify the problem․ Common issues include faulty sensors‚ loose connections‚ or battery malfunctions․ Resetting the system or recalibrating sensors may resolve the issue․ For persistent errors‚ consult the manual or contact a professional․ Regular checks and maintenance can help prevent these issues‚ ensuring smooth and safe rides․ Always keep the manual handy for quick reference․
5․2 Updating Firmware and Software
Regular firmware and software updates are essential for maintaining optimal performance and compatibility with your e-bike’s LCD display․ To update‚ connect the display to your computer using the provided cable and download the latest software from the manufacturer’s website․ Follow the on-screen instructions to complete the update process․ Ensure the device is fully charged and avoid interrupting the update to prevent system corruption․ Updated firmware enhances functionality‚ fixes bugs‚ and improves responsiveness․ Always refer to the manual for specific instructions‚ as procedures may vary between models like the SW900 or KT-LCD3 displays․
Safety Considerations
Ensure the LCD display is securely mounted and protected from water exposure․ Avoid submerging it in water and clean only with soft‚ dry cloths․ Use genuine accessories and follow manual guidelines to prevent damage or malfunction․ Always monitor battery levels and avoid extreme temperatures to maintain optimal performance and safety while riding․
6․1 Precautions for Using the LCD Display
To ensure safe and effective use of your e-bike’s LCD display‚ avoid exposing it to direct water or moisture․ Use only genuine accessories and follow the manual’s cleaning instructions with soft‚ dry cloths․ Avoid touching the screen with wet hands to prevent damage․ Regularly check for software updates and ensure the display is securely mounted to avoid vibrations․ Never submerge the display in water or expose it to extreme temperatures․ Always follow the manufacturer’s guidelines to maintain functionality and longevity․
6․2 Waterproofing and Protection Tips
To protect your e-bike’s LCD display‚ ensure it is equipped with a waterproof connector and avoid submerging it in water․ Use a high-quality cover or case to shield it from rain and dust․ Regularly inspect the display for signs of moisture or damage․ Clean the screen with a soft‚ dry cloth to prevent smudges․ Avoid extreme temperatures and vibrations‚ which can affect functionality․ Secure the display firmly to the handlebar to prevent movement․ For added protection‚ apply a tempered glass screen protector․ Regular maintenance will help extend the life of your LCD display․
Discover how the e-bike LCD display enhances your riding experience․ With real-time data‚ customizable settings‚ and advanced features‚ it ensures safety‚ efficiency‚ and a seamless journey every time․
7․1 Summary of Key Features and Benefits
The e-bike LCD display is a vital component‚ offering real-time data like speed‚ battery level‚ and PAS modes․ It provides customizable settings for optimal performance‚ including eco‚ standard‚ and power modes․ Key features include waterproof design‚ error code monitoring‚ and firmware updates․ Benefits such as enhanced control‚ energy efficiency‚ and safety make it an indispensable tool for riders․ By understanding and utilizing these features‚ users can maximize their e-bike’s potential‚ ensuring a seamless and enjoyable riding experience tailored to their preferences and needs․
7․2 Final Tips for Maximizing E-Bike Performance
To maximize your e-bike’s performance‚ regularly monitor and adjust settings via the LCD display․ Optimize battery life by avoiding extreme discharges and using eco mode for longer rides․ Ensure firmware is updated for the latest features and security patches․ Clean the display to maintain visibility and protect it from water exposure․ Familiarize yourself with error codes to address issues promptly․ Experiment with riding modes to find the best balance of power and efficiency․ Finally‚ always refer to your manual for troubleshooting and customization options to enhance your e-bike experience․